Running your website on the correct PHP version is essential for performance, security, and compatibility with modern applications like WordPress, Joomla, or Laravel. Fortunately, if your hosting provider uses cPanel, updating your PHP version is a straightforward process.
In this guide, we’ll walk you through how to change the PHP version in cPanel, step by step, with helpful tips along the way.
Why Change Your PHP Version?
Before we dive in, here’s why you might want to change your PHP version:
- To meet the requirements of a new CMS or plugin
- To improve site speed and performance
- To enhance security (older versions may be vulnerable)
- To test your site on a newer or legacy version
Step-by-Step Guide: Changing PHP Version in cPanel
Step 1: Log in to cPanel
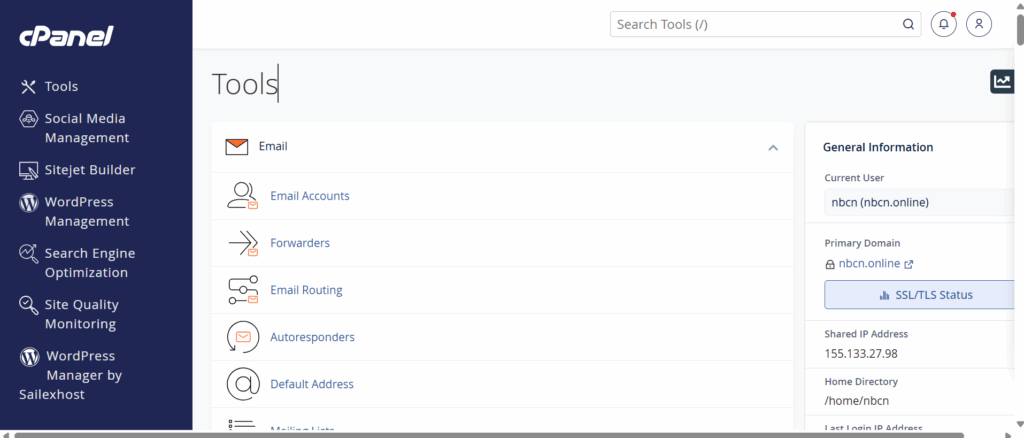
Open your web browser and go to your cPanel login URL (usually something like yourdomain.com/cpanel).
Enter your username and password. and login
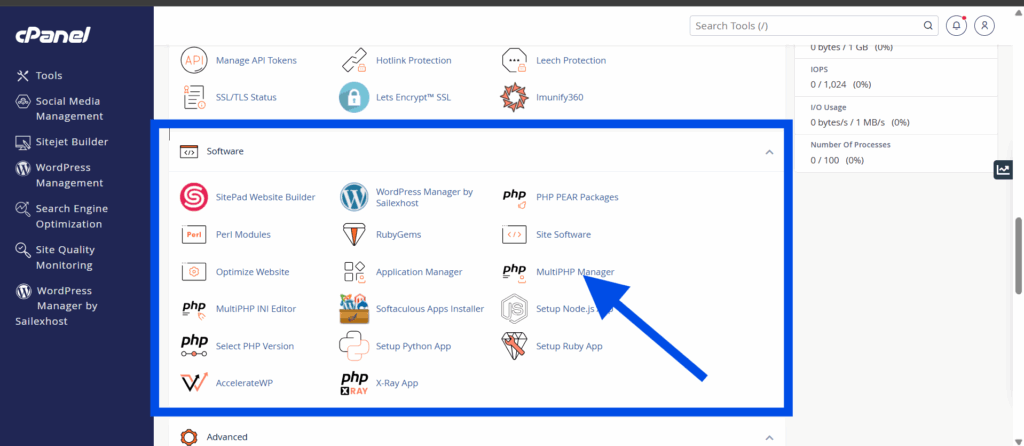
Step 2: Locate the “Select PHP Version” or “MultiPHP Manager”
Depending on your hosting provider, you’ll find one of the following options in the Software section:
- Select PHP Version (used by CloudLinux-based hosts)
- MultiPHP Manager (used by cPanel servers with EasyApache 4)
Tip: If you see both, use MultiPHP Manager for domain-specific changes.
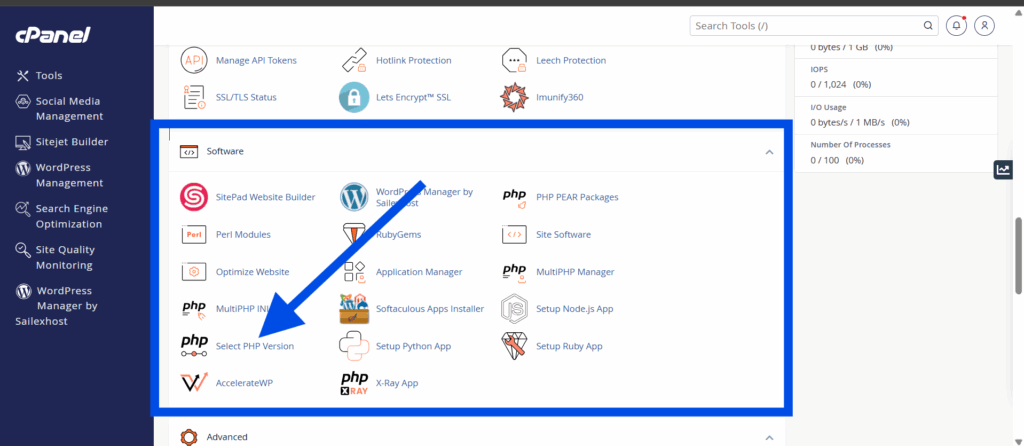
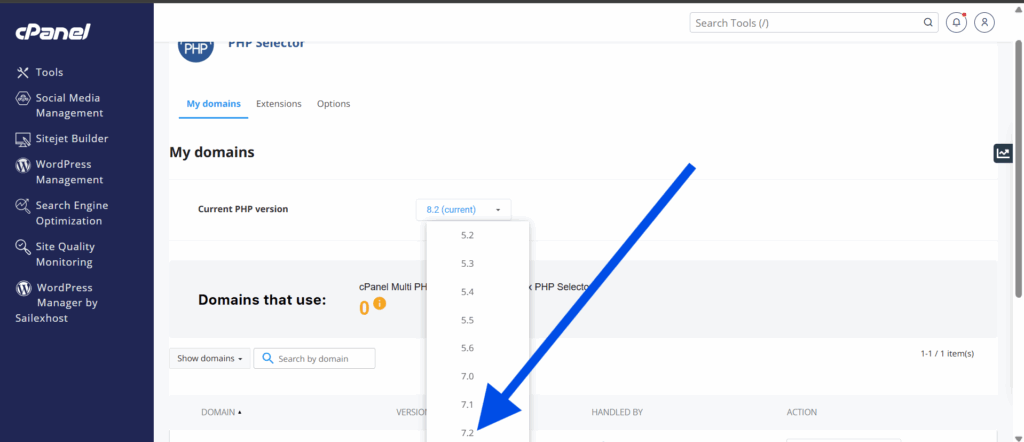
Step 3a: Using “Select PHP Version” (CloudLinux)
- Click on Select PHP Version.
- In the dropdown menu at the top, choose the desired PHP version (e.g., PHP 8.2).
- Click Set as current.
- You can also enable/disable specific PHP extensions below if needed.
- Click Save or Apply.
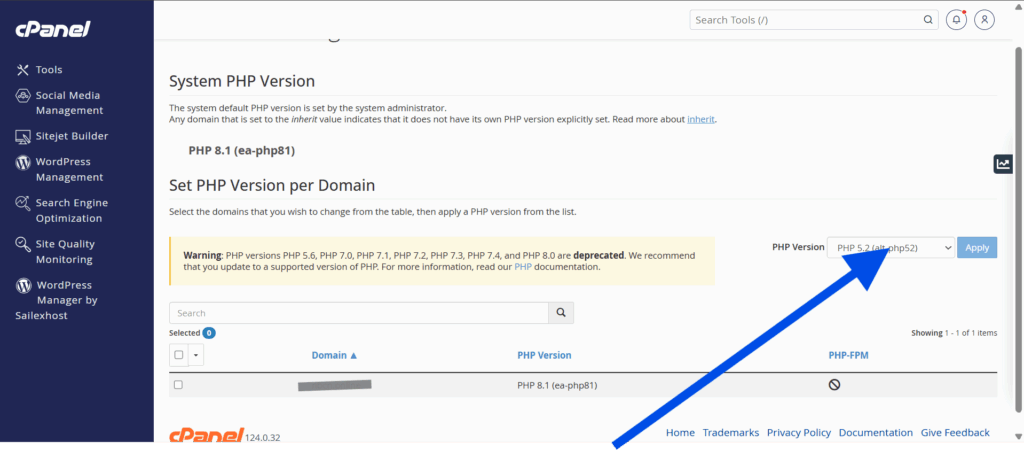
Step 3b: Using “MultiPHP Manager”
- Click on MultiPHP Manager.
- Scroll down to the list of domains on your hosting account.
- Check the box next to the domain(s) you want to update.
- From the PHP Version dropdown on the right, choose the version you want (e.g., PHP 8.1).
- Click Apply.
Note: MultiPHP Manager allows you to set different PHP versions for each domain or subdomain
Step 4: Verify Your PHP Version
To confirm that your changes worked:
Create a file called phpinfo.php in your public_html directory.
Add this code:
<?php phpinfo(); ?>
- Save and upload the file.
- Visit
yourdomain.com/phpinfo.phpin your browser. - Look at the top of the page for the active PHP version.
🔐 Don’t forget to delete this file afterward for security reasons.
What If You Don’t See the Version You Need?
- Some shared hosts limit PHP versions for stability or security reasons.
- You may need to request an upgrade from your host or move to a VPS for full control.
- Make sure your website or CMS is compatible with the new version to avoid breaking functionality.
Final Thoughts
Changing your PHP version in cPanel is a simple yet powerful way to keep your website optimized, secure, and compatible with the latest web technologies. Whether you’re upgrading to a new PHP version or testing legacy compatibility, cPanel gives you the tools to do it with just a few clicks.
Always back up your website before making major changes, and double-check compatibility with your CMS, themes, and plugins.

I can’t believe how much value you packed into this post. It’s a must-read for anyone in the field.
Thank you! I’m so glad the post was helpful to you.
This post really resonates with me. You’ve perfectly articulated what I’ve been thinking!